How to Convert an Image to PDF in Google Drive
You can create a PDF copy of an image from Google Drive by opening the image and using the Print option. This is useful when you need to submit receipts, forms, notes, scanned pages, or assignment images as a PDF file.
PDFs are easy to share, preserve formatting, and are widely accepted by websites, schools, companies, and document upload systems.
Google Drive does not have a separate Convert to PDF button for images. To create a PDF copy, open the image in Google Drive and use the Print option. If the image contains text, you can also open it with Google Docs to extract the text with OCR.
Google Drive does not have a separate Convert to PDF button for images. To create a PDF copy, open the image in Google Drive and use the Print option. If the image contains text, you can also open it with Google Docs to extract the text automatically using OCR (Optical Character Recognition).
In this guide, you will learn three methods to convert an image to PDF in Google Drive.
Table of Contents
Prerequisites
Before you begin, make sure you have the required tools and files ready.
- A Google account with access to Google Drive
- The image file ready on your device. For Google Docs OCR, use JPEG, PNG, or GIF for best support. If the image is still on your phone, upload it to Google Drive first.
- For the mobile method: Google Drive app installed on your Android device.
Converting an Image to PDF in the Google Drive Web App
The Google Drive web app gives you two ways to convert an image to PDF:
- Use Google Docs if your image contains text you need to read, search, edit, or download as a PDF.
- Use the print method if you just need a clean PDF copy of the image with no text extraction.
Creating a Searchable PDF with Google Docs OCR
You can convert an image to a PDF through Google Docs. Google Drive automatically reads the text in the image using OCR.
OCR stands for Optical Character Recognition. It converts text from an image into editable content, so the resulting PDF is a real document, not just a picture.
This method is the right choice when your image contains printed or typed text, such as a scanned form, letter, or invoice.
When to use: Use this method when you need to review and correct extracted text before downloading it as a searchable PDF.
For best results - upload a sharp, upright image with clear printed text. Google Drive OCR works best when the text is easy to read, evenly lit, and large enough to recognize.
Uploading and Opening in Google Docs
- Go to Google Drive and sign in.
- Click + New in the top-left corner.
- Select File upload.
- Choose your image file and click Open.

- Right-click the uploaded image file in Google Drive.
- Click Open with → Google Docs.
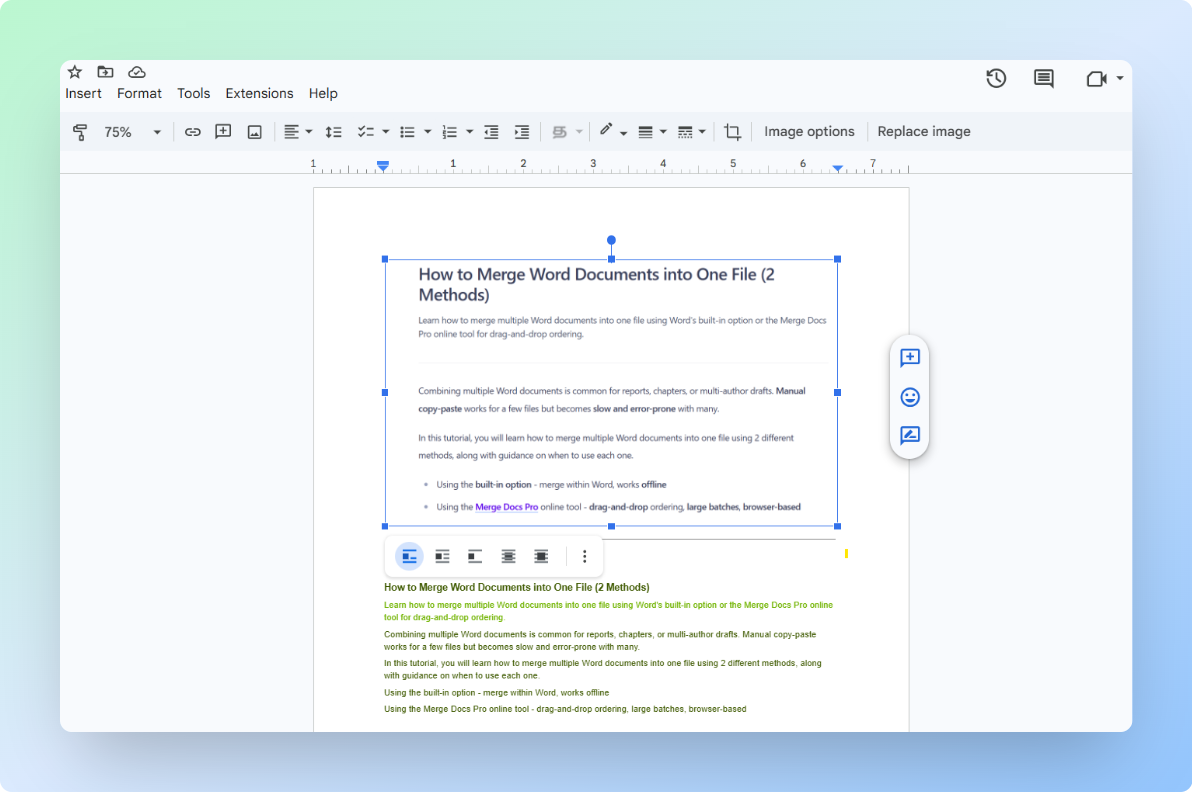
Google Docs opens with the original image at the top and the extracted text below it. If OCR worked, the text below should match the text printed in the image.
For more details, see Upload files to Google Drive.
Compare the extracted text with the original image before you download the PDF. OCR works best with clear, printed text. It can make mistakes with handwriting, unusual fonts, blurry images, or low-resolution files.
Note: If no text appears below the image, Google Docs could not read the text clearly. Try uploading a clearer image with sharper text.
Reviewing and Downloading as PDF
- Read through the extracted text and correct any errors you spot.
- Go to File → Download → PDF document (.pdf).
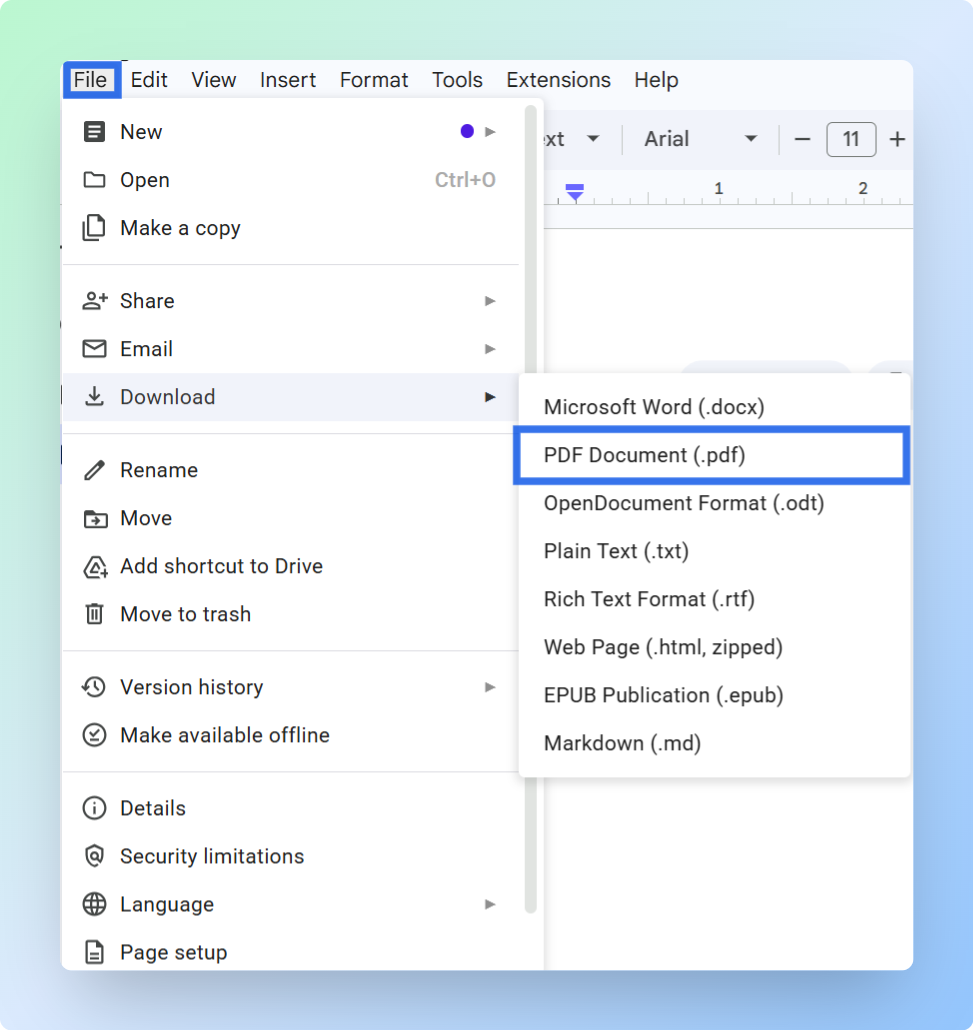
The PDF downloads to your computer. It contains the original image and the text extracted in Google Docs.
Once the PDF is saved, you can add a PDF link in Google Sheets, if you need to track receipts, forms, or scanned documents in a spreadsheet.
If you do not need to extract text, you can use a faster method below.
Printing the Image to PDF from Google Drive
You can convert an image to a PDF directly in the Google Drive web app using the Print function. This method saves the image as a PDF file without changing the image content.
When to use: Use this method when you only want the image saved as a PDF and do not need the text inside the image to be searchable.
Uploading the Image
- Go to Google Drive and sign in.
- Click + New → File upload.
- Choose your image file and click Open.
Converting to PDF Using Print
Google Drive opens the image preview. Your browser or system print dialog then lets you save the image as a PDF.
-
Double-click the uploaded image to open it.
-
Click the Print icon in the top-right corner of the viewer.
-
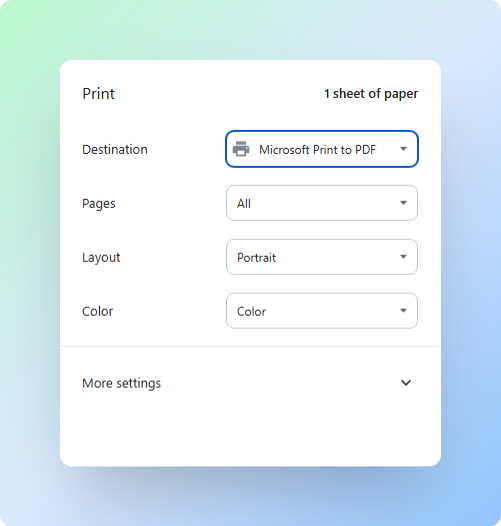
In the print dialog, open the Destination or Printer dropdown.
-
Select Save as PDF. On Windows, this may appear as Microsoft Print to PDF.
- Click Save or Print, depending on your browser.
- Choose where to save the file.
- Enter a file name.
- Click Save.
Your image is now saved as a PDF file on your computer. Open it to confirm that the image appears correctly.
Note: If you are using Google Drive for desktop, open the image file on your computer and press Ctrl + P on Windows or Cmd + P on Mac to open the print dialog. Then follow the same save steps above for your operating system.
Converting an Image to PDF on Android Using the Google Drive App
On Android, you can convert an image to a PDF from the Google Drive app when the image preview shows the Print option.
When to use: Use this method when you need to save an image as a PDF from your phone without using a desktop.
Upload your image to Google Drive first, then use the print function to save it as a PDF directly on your device.
Uploading the Image
- Open the Google Drive app on your phone.
- Tap + New.
- Select Upload.
- Choose your image file from your device.
- Wait for the upload to finish.

For more details, see Upload files to Google Drive.
Converting to PDF
- Tap the uploaded image to open it.
- Tap the three-dot menu (⋮) in the top-right corner.
- Select Print.
- On the print screen, select Save as PDF.
- Choose where to save the file.
- Tap Save.
The image is now saved as a PDF on your Android device. Open it to confirm that the image displays correctly.
After saving the PDF, open it once to confirm that the image appears clearly and the file saved in the correct location.
To share a PDF file, see how to share a PDF as a link in Google Drive.
Related Free Tools
After converting a receipt or form image to PDF, you may want a proper business document instead of a raw scan:
- Sales Receipt Generator — formatted receipts with your business details
- Invoice Generator — replace scanned invoice photos with clean PDF invoices
- Browse all free business tools
Conclusion
You can convert an image to PDF in Google Drive in three ways. Choose the method based on the result you need.
- Google Docs OCR: For extracting, editing, and saving image text as a searchable PDF.
- Web print method: For creating a quick image-only PDF from a computer.
- Android print method: For saving an image as a PDF from your phone when the print option is available.
If you create multiple PDFs from images, organize them in a Google Sheets file index with file names, Google Drive links, file sizes, and file types so each PDF is easier to find and share later.