How to Upload Photos to a Shared Google Drive Folder
A shared Google Drive folder gives a team or external contributors one place to upload, access, and manage photos together. No email attachments, no separate file transfers.
But Google Drive does not create a clean photo log for you. If a folder has many uploads, you may still need a sheet that shows each photo name, link, preview, size, and upload batch in one place.
In this guide, you will learn how to upload photos to a shared Google Drive folder using three methods, along with guidance on when to use each one.
Table of Contents
Prerequisites
Before you start, make sure you have:
- A Google account
- Access to the shared Google Drive folder where you want to upload photos.
- The Google Drive iOS or Android app, if you want to upload photos from your phone
- Permission to install Google Workspace add-ons, only if you want to use Drive Explorer Pro
Finding the Shared Folder and Checking Upload Access
You can find a shared Google Drive folder in two places, depending on how it was shared with you. Check the table below to confirm you are in the right location before uploading.
| Folder location | What it means |
|---|---|
| Shared with me | Someone shared the folder directly with your Google account. |
| Shared drives | The folder belongs to a team or organization. |
Open the shared folder. Then check whether you can see the + New button.
If + New > File upload is available inside the shared folder, you have permission to upload photos there.
If + New is missing, you do not have upload access. Sign in with the correct Google account, or ask the folder owner for Editor access. For a Shared Drive (a team-owned drive, not a personal folder), ask for Contributor access, which allows uploading without the ability to delete others files.
Note: Shared Drives use different access roles from personal shared folders. See Google's guide to Shared Drives and access levels for more information.
Once you have confirmed access, choose the upload method that matches where you are working from.
Uploading Photos to a Shared Google Drive Folder on the Web
You can upload photos to a shared Google Drive folder from any browser. Use this method when you are on a computer and want to upload one or more photos quickly.
Note: If the shared folder already has many photos, open the correct subfolder before uploading. This keeps photos easier to find later.
-
Go to Google Drive and sign in.
-
Open the shared folder.
-
Click + New.

-
Click File upload.
-
Choose the photo from your computer.
-
Click Open.
Alternatively, you can also drag and drop photos from your computer into the open shared folder. This is faster when you need to upload multiple photos at once.
Result: Google Drive uploads the photo to the shared folder. You can see the upload progress in the bottom-right corner. When the upload finishes, the photo appears inside the folder.
If your photos are already organized in a folder, click + New > Folder upload. Select the folder from your computer and click Upload. Google Drive keeps the folder and photo structure together.
If you're on your phone instead of a computer, the mobile app gives you the same result in a few taps.
Uploading Photos to a Shared Google Drive Folder on Mobile
You can upload photos to a shared Google Drive folder directly from your phone. Use this method when the photo is already on your device, in your camera roll, gallery, or Downloads folder.
Use clear photo names before or after uploading. Camera names like IMG_4823.jpg are hard to scan later, so rename the file when your device gives you the option, or rename it in Google Drive after upload.
-
Open the Google Drive app.
-
Open the shared folder.

-
Start the upload:
- On Android: Tap +, then tap Upload.
- On iPhone or iPad: Tap +, then tap Upload File.
-
Choose the photo from your phone.
-
Check the upload location before confirming. On iPhone or iPad, click Location if you need to choose the shared folder.
-
Wait for the upload to finish.
Result: Google Drive adds the photo to the shared folder once the upload finishes.
Note: iPhones set to High Efficiency will save photos as HEIC files. These files can be harder to preview or use in some workflows. For easier previews, upload JPEG copies.
The Google Drive web and mobile apps can upload photos, but they don't create a searchable spreadsheet of uploaded files. Use Drive Explorer Pro when you also need a Google Sheets record with photo previews, links, and file details.
Uploading and Tracking Shared Folder Photos with Drive Explorer Pro
Drive Explorer Pro is a Google Sheets add-on that connects Google Sheets with Google Drive.
You can use this method when uploading photos is not enough and you also need a Google Sheets record of each file.
Drive Explorer Pro uploads the photos to the selected shared folder and lists each photo in a row with the details you choose, including a thumbnail preview, file name, link, and file size.
Before using this method, make sure you have upload access to the shared folder.
Why use Drive Explorer Pro
- Upload multiple photos at once without repeating the same steps for each file.
- Add image previews, file names, links, and sizes to Google Sheets without manual entry.
- Set the image preview size and file access once, then reuse the same settings for future uploads.
This is particularly useful for teams managing:
- Event photos
- Product images
- Client deliverables
- Project documentation
- Student submissions
- Team asset libraries
Install Drive Explorer Pro from the Google Workspace Marketplace:
Launching Drive Explorer Pro
Open the Google Sheet where you want to record the uploaded photo details. If you do not have one yet, create a blank sheet first.
- In Google Sheets, go to Extensions > Drive Explorer Pro > Open Drive Explorer Pro.
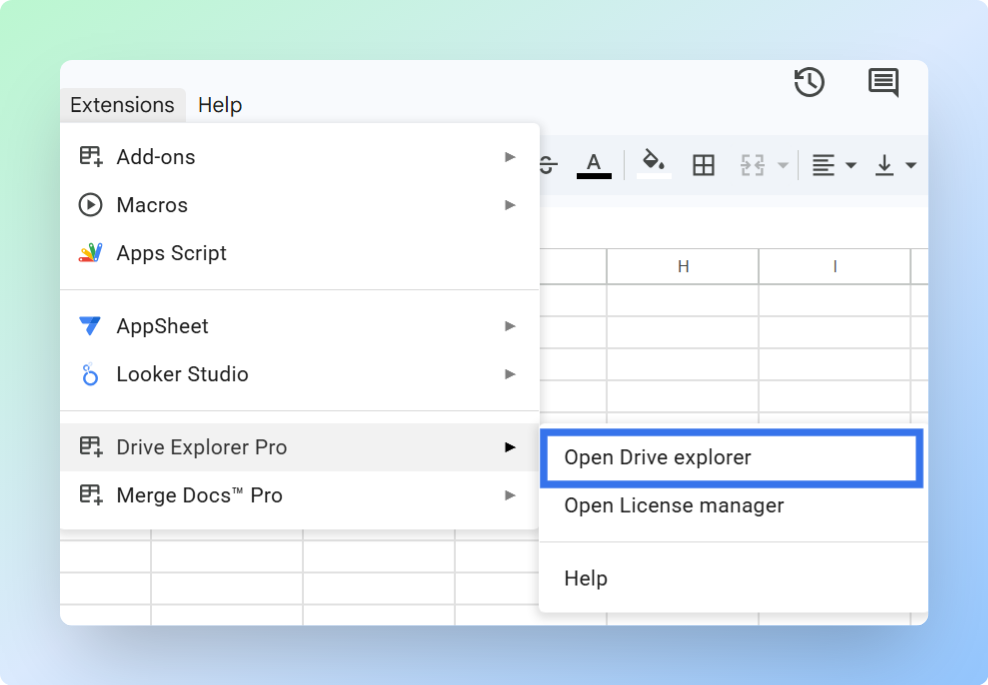
The Drive Explorer Pro sidebar opens on the right side of the sheet.
One-time setup: Complete the steps in the next three sections once. Drive Explorer Pro saves your settings for future uploads.
Selecting the Shared Folder
Choose the shared Google Drive folder where the photos should go. Setting this before uploading prevents photos from landing in the wrong folder.
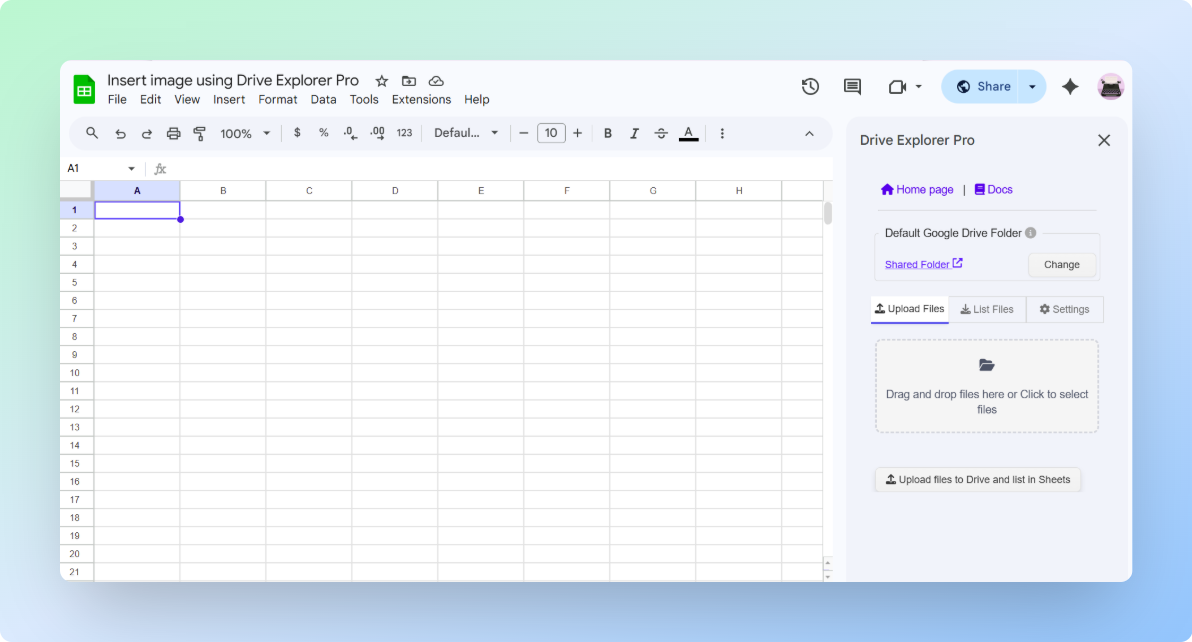
- In the Drive Explorer Pro sidebar, find the Default Google Drive Folder section.
- Click Change.
- Browse to the shared Google Drive folder in the file picker and click it to select it.
- Click Select to confirm the folder.
Drive Explorer Pro uploads all photos to the folder you select here.
Choosing File Details and Setting Image Preview Size
Choose which photo details Drive Explorer Pro should add to your sheet. Also set the image preview size so thumbnails are easy to identify.
-
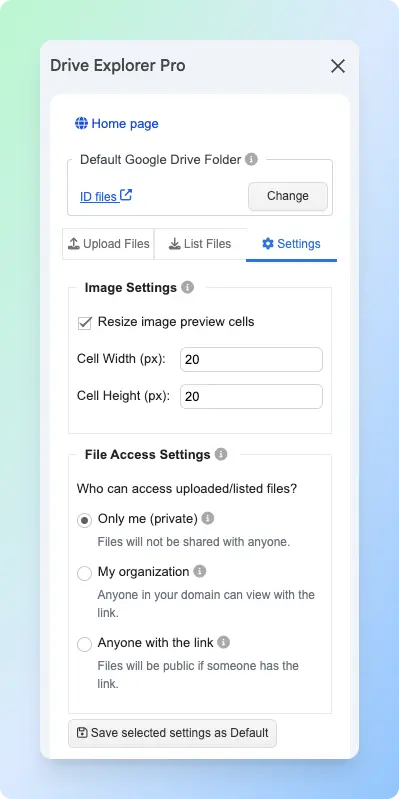
Click the Settings tab in the sidebar.
-
Under Image Settings, turn on Resize image preview cells.
-
Enter the Cell Width (px) and Cell Height (px).
Use 100 to 150 px for most photo logs. Increase the size only if people need to identify photos without opening Google Drive.
-
Click Save selected settings as Default.
-
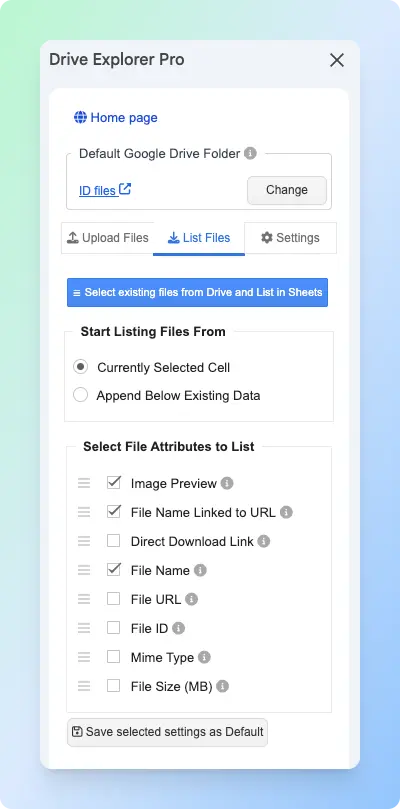
Click the List Files tab in the sidebar.
-
Under Start listing file from, choose where the photo details should appear.
| Option | What it does |
|---|---|
| Currently Selected Cell | Adds photo details starting from the selected cell. |
| Append Below Existing Data | Adds new rows below the existing sheet data. |
For a shared folder photo log, choose Append Below Existing Data. This keeps each new upload batch below the previous rows.
- Under Select File Attributes to list, choose the photo details you want to record.
| Attribute | What it logs | Best for |
|---|---|---|
| Image Preview | A thumbnail of the photo inside the cell. | Browsing photos without opening Google Drive. |
| File Name Linked to URL | A clickable name that opens the photo in Google Drive. | Sharing and identifying photos at a glance. |
| File URL | A standard Google Drive link to the photo. | Copying and sharing the photo link. |
| Direct Download Link | A link that downloads the photo directly. | When recipients need to save the photo. |
| File Size (MB) | The photo size in megabytes. | Tracking large photo batches. |
| Mime Type | The photo format: image/jpeg, image/png, or image/heic. | Filtering by format when your team uploads a mix. |
| File ID | The unique Google Drive file ID. | Advanced workflows or API use. |
For most shared folder photo logs, select:
- Image Preview
- File Name Linked to URL
- File URL
- File Size (MB)
- Click Save Selected Settings as Default.
Setting File Access Before Uploading
Set who can open the photo links before uploading. This prevents teammates or clients from seeing a Request access page when they click a link in your sheet.
Important: Sharing the Google Sheet does not share the uploaded photos. Set the correct File Access Settings before uploading so every link works for recipients.
-
Go to the Settings tab in the Drive Explorer Pro sidebar.
-
Under File Access Settings, choose the access level you need.
| File Access Setting | When to use it |
|---|---|
| Only me (private) | Use when the uploaded photos should stay private. |
| My organization | Use when only people in your organization should open the photos. |
| Anyone with the link | Use when people outside your organization need to open the photos. |
- Click Save Selected Settings as Default.
Uploading Photos and Logging Them in Google Sheets
After setting the folder, attributes, and access level, upload your photos. Drive Explorer Pro handles the upload and the logging in one step.
-
Click the Upload Files tab in the sidebar.
-
Drag and drop your photos into the upload area, or click the upload box to choose photos from your computer.
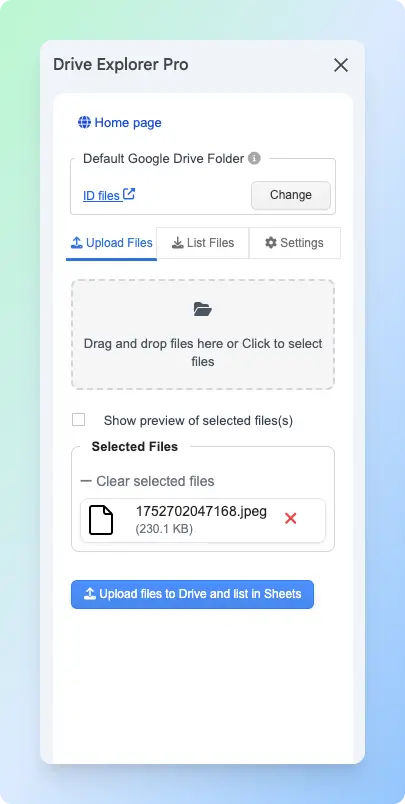
-
Turn on Show preview of selected files so you can review the photos before uploading.
-
Check the preview list and make sure the right photos are selected.
Tip: Drag photos in the preview list if you want to control the order they appear in Google Sheets.
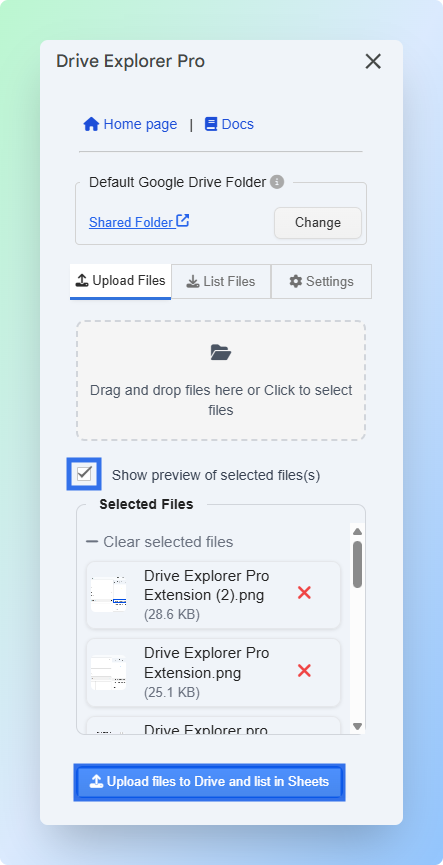
- Click Upload files to Drive and list in Sheets.
Important: Do not close Google Sheets while the upload is running. Closing the tab can stop the upload and leave the photo list incomplete.
Drive Explorer Pro uploads the photos to the selected shared folder and adds each photo as a new row in Google Sheets.
The sheet columns match the attributes you selected: image preview, file name, file URL, file size, MIME type, and download link.

If recipients need to download photos directly, see how to create a direct download link in Google Drive before adding download links to your sheet.
Tip: If teammates need the full photo log, share the Google Sheet after uploading. Google Sheets access and Google Drive file access are managed separately.
Choosing the Right Upload Method
Choose the method based on where your photos are stored and whether you need a Google Sheets record.
| Method | Use it when | Main benefit |
|---|---|---|
| Google Drive web app | You are on a computer and need to upload photos or photo folders. | Works in any browser with no add-on. |
| Google Drive mobile app | The photos are on your phone, camera roll, gallery, or Downloads folder. | Uploads directly from your phone. |
| Drive Explorer Pro | You need to upload photos and keep a structured record in Google Sheets. | Logs previews, names, links, sizes, and formats automatically. |
If you only need to upload photos to your own Google Drive and share a link, see how to upload files to Google Drive and share a link.
Conclusion
Uploading photos to a shared Google Drive folder gives teams one place to collect and access images without sending email attachments back and forth.
Use the Google Drive web or mobile app for simple uploads. If your team also needs a searchable photo log with previews, links, sizes, and other details, Drive Explorer Pro can automatically create the record in Google Sheets while uploading the photos.